Scheduling Reports
Reports are scheduled from the respective charts or dashboards. You can configure a list of email addresses to which the reports can be sent on a recurring basis. Once configured, the Analytics platform continues to send the reports at the scheduled frequency without any intervention.
To schedule a report, select an option from the Create Schedule window.
-
Schedule Now - To share the details of the current report immediately.
For more details, refer to Using Schedule Now.
-
Schedule Later - To generate the report for a specific time such as daily, weekly, or monthly.
For more details, refer to Using Schedule Later.
|
|
Note
|

Using Schedule Now
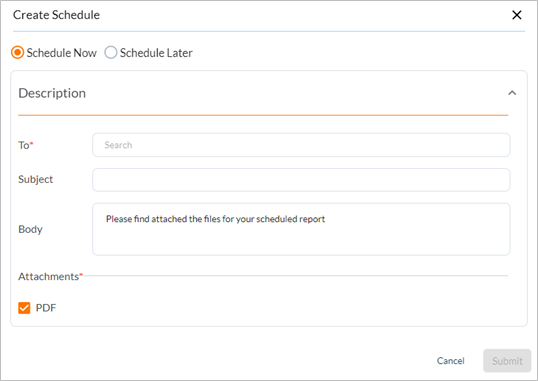
Use the Schedule Now option to share the current details of a report. For example, if you have selected specific filters and must immediately share the report, you can directly send the report using this option. Selecting the Schedule Now option displays the following fields.
|
|
Note You need not download the report separately and send it as an email. |
To schedule the current report using Schedule Now option, follow these steps:
-
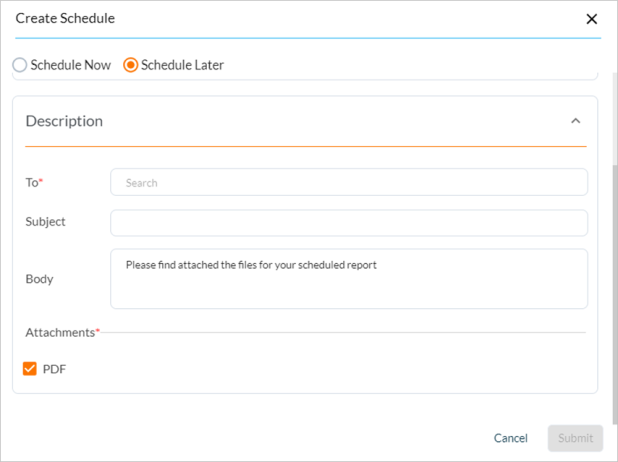
Enter the recipient(s) in the To field.
-
Enter the report name in the Subject field.
The report is attached in the Body.
-
Click Submit.
|
|
Note
|
Using Schedule Later
Use the Schedule Later option to generate the report and share it with multiple users over a specific period of time and frequency. Selecting the Schedule Later option displays the following fields.

To schedule a report using Schedule Later option, follow these steps:
-
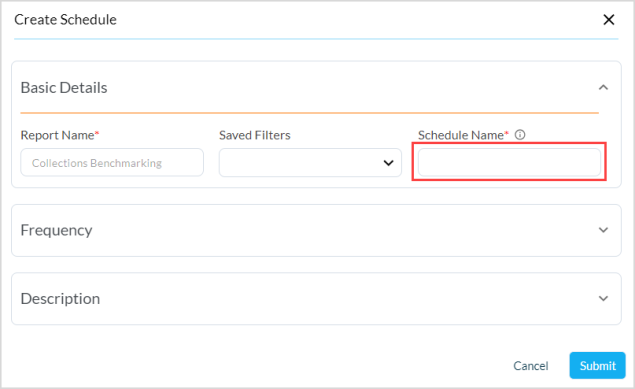
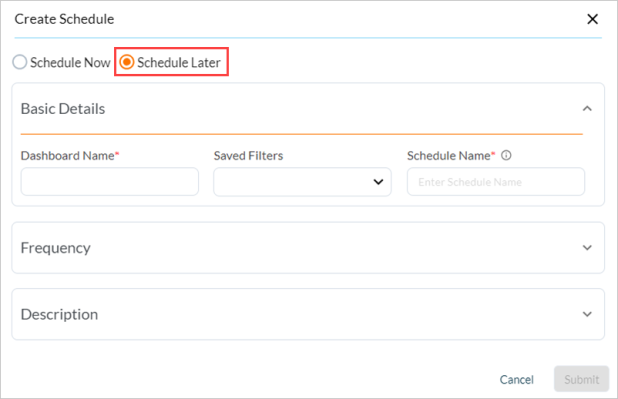
In the Basic Details section, provide the Schedule Name.
-
If you want to apply a filter on the chart or dashboard, click the Saved Filters drop-down menu and select the required filter from the list of saved filters.
For more information, refer to Scheduling with Filters.
-
Click the expand icon to view the fields in the Frequency section.
-
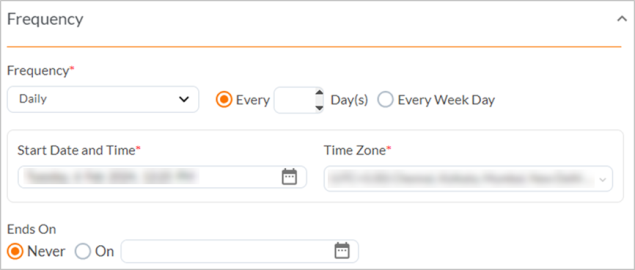
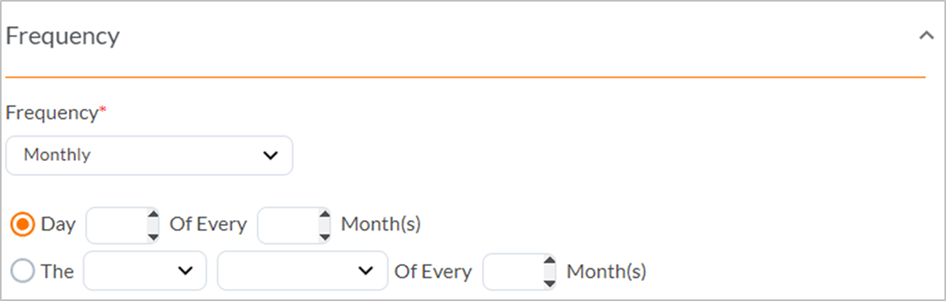
Set the Frequency as Monthly, Weekly, or Daily. Refer to the following table for details.
Frequency*
Description
Daily
You can choose to specify how often you want to send the report, for example, every two days or on every weekday.

Weekly
Select the day(s) of the week on when you want the report to be sent.

Monthly
Select the day(s) of the month on when you want the report to be sent.
-
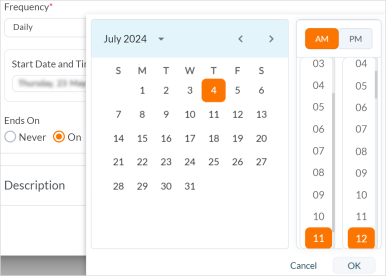
In the Start Date and Time* field, click the date picker icon to pick a date and time at which you want the report to be generated.

-
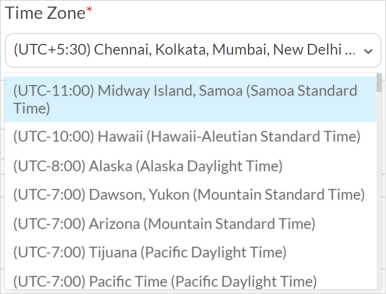
In the Time Zone* field, click the drop-down button and select the time zone in which you want the report to be generated.
-
In the Ends On field, select Never or click On.
If you select On, click the date picker icon to pick a date and time at which you want to stop sending the report.
-
In the Description section, provide the required email address(es) to which you want to send the selected reports.

Information
You can add multiple emails using comma as a separator.
-
Provide the required information in the Subject and Body text fields.
-
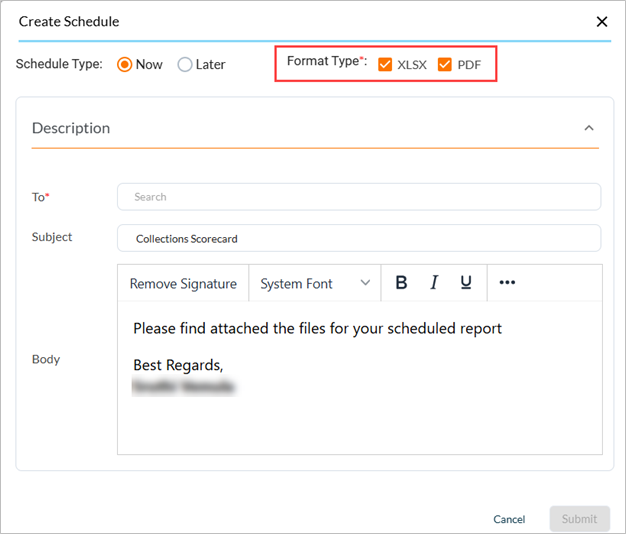
In the Attachments section, select the required checkbox to attach the report as XLSX, or PDF format as per the requirement.
-
After providing all the required information, click Submit.
A success message is displayed confirming that the report schedule is added. Click the close icon to exit the window.
|
|
Note You can schedule multiple reports from a single chart or dashboard. |
Scheduling with Filters
You can save a filter for all the grid reports for their future reference. To save or manage a filter, refer to Managing Filters.
You can also schedule reports with the saved filters. To schedule reports using the Saved Filters option, follow these steps:
-
From the dashboard or chart, navigate to Kebab icon > click Schedule.
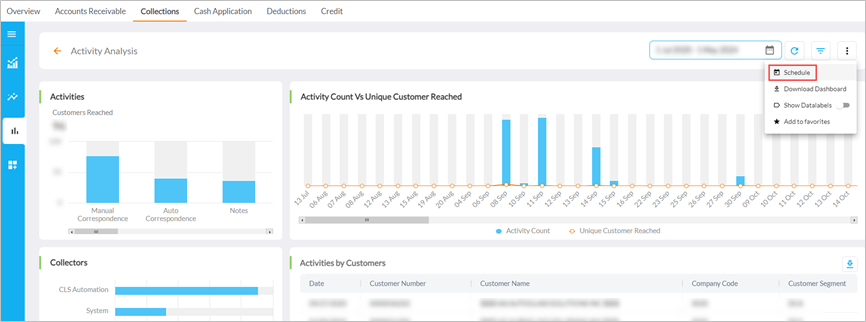
The Create Schedule window is displayed.
-
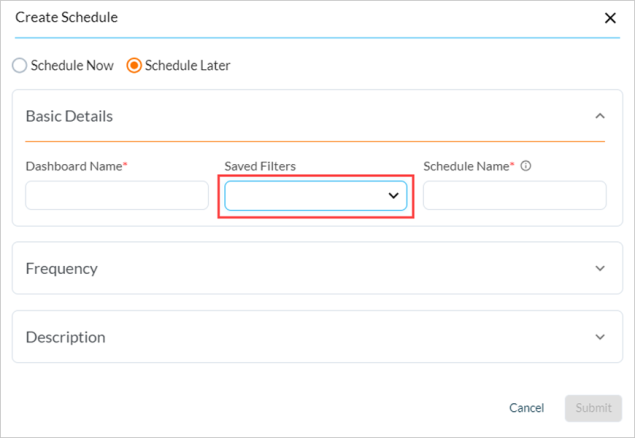
Select Schedule Later option.
-
Provide the details in the required fields and select the saved filter from the Filter drop-down menu.
-
Click Submit to add a schedule.
To manage the scheduled reports, refer to Managing Scheduled Reports.